Sams Teach Yourself HTML, CSS & JavaScript Web Publishing in One Hour a Day, loves to stay current with the newest elements of web design. She believes CSS has vast potential, but is too often ignored. Learn about a very useful (but underused) feature of CSS3: flex boxes.">
How to Build Flexible Web Page Designs with CSS3 Flex Boxes | | InformIT - 188bet足球靠谱
Jennifer Kyrnin, co-author ofSams Teach Yourself HTML, CSS & JavaScript Web Publishing in One Hour a Day, loves to stay current with the newest elements of web design. She believes CSS has vast potential, but is too often ignored. Learn about a very useful (but underused) feature of CSS3: flex boxes.
CSS3 has been around for a while now, and many of the specifications that encompass it are well supported in web browsers. But you would never know it by looking at most pages on the Web. Some web designers still insist on using tables for layout, and some even use thetag.
Staying current with CSS can benefit your websites, your customers, and you (particularly if you're a freelancer). One current feature that you should consider using is the CSS3 flex box.
What Are CSS3 Flex Boxes?
CSS3 flex boxes give you a way to position elements in either a horizontal or vertical layout. Rather than setting explicit placement with thepositionandtoporleftproperties, or using thefloatproperty to let elements position themselves, you can use CSS flex boxes to define an area of a page or the entire layout, and let the browser place and resize the content within the box.
You create a container element, and the child elements of that container can grow or shrink to fill the unused space in the container. This elasticity makes flex boxes perfect for things like catalogs and photo galleries, where the number of items might change periodically, but you can even use flex boxes to design entire web page layouts.
So why are flex boxes rarely used? Most designers avoid them because of a perceived lack of browser support. However, as of early December 2015, CSS3 flex boxes were fully supported globally, without prefix, on nearly 75% of all browsers, with an additional 6.75% offering partial support¾for a total of 81% of all browsers. If you're willing to use browser prefixes, that total jumps to 95%. [1] And if you write your HTML well, the remaining 5% of browsers will still be able to read your page just fine; users simply won't see your fancy layout.
How to Use CSS3 Flex Boxes
CSS3 flex boxes are easy to use. You just need to style the container element as a flex box and then style the items inside the container to flex however you want.
Styling the Container Element
The container is the element that holds all the flexible content. Although you can use thetag as your container, I recommend staying with the tags you're already using in your document, to keep them semantic. Some possible container elements you can use:
Once you have the container, set the dimensions—height, width, or both. You can use flexible values such as percentages. You're not required to set the specific dimensions of the container, but I find it easier to work with containers that have a set size.
接下来,给容器一个灵活的布局:
display: flex;
This line tells the browser that the styled element is a flexible box container. It will display on the page as a block element, and all of the items inside it will be flex boxes.
You can also create inline flexible box containers:
display: inline-flex;
This makes the container an inline element, and all the elements inside it are flex boxes.
You need to specify which direction your boxes will flow—horizontally or vertically. You can define this direction with theflex-directionproperty. Possible values includerow(the default),row-reverse,column, andcolumn-reverse. If the direction is defined ascolumn, the items will display in a vertical column in the box, starting at the top. Thecolumn-reversevalue defines a vertical column starting from the bottom of the container. Therowvalue creates a row starting from the starting position of text on the page (on the right for right-to-left pages and on the left for left-to-right pages). Therow-reversevalue reverses that direction.
By default, flex boxes attempt to put all the items in the box in one row or one column. If you want them to wrap, you need to add theflex-wrapproperty to your container. This property has possible values ofnowrap(the default),wrap, andwrap-reverse. Wrapping will happen in the same direction as the text on the page, just like with theflex-directionproperty.
The easiest way to define these two properties is with theflex-flowshorthand property. It has this format:
flex-flow:flex-directionflex-wrap;
You can also define how the content should flow both horizontally and vertically within your container. To adjust how the elements align horizontally, use thejustify-contentproperty with the values in Table 1.
Table 1
Values for thejustify-contentProperty
Value
Description
flex-start
With this default setting, the items will align with the starting side of the container. Any extra space will be left at the end.
flex-end
The items will align with the ending side of the container. Any extra space will be at the beginning of the line.
center
The items will be centered within the container.
space-between
The space between items will be adjusted to fill the width of the container.
space-around
The space around items will be adjusted to fill the width of the container.
You can also adjust how the elements align vertically, using thealign-itemsproperty and the values in Table 2.
Table 2
Values for thealign-itemsProperty
Value
Description
flex-start
The items will align with the top of the container. Any extra space will be at the bottom.
flex-end
The items will align with the bottom of the container. Any extra space will be at the top.
center
The items will be centered vertically within the container.
baseline
The items will be aligned with the text baseline. Any extra space will be spread around the items.
stretch
This default setting stretches the items to fit the entire height of the container.
Note: Centering Is NowReallyCentered
The HTML tag
was deprecated when CSS first came out, and using CSS was suggested instead. But there was never a good, all-purpose centering property. Instead, you had to define the margins asautoand fiddle with vertical alignment, and it was just difficult. But with flex boxes, you simply define your items as centered, and they're centered. Done.
But thealign-itemsandjustify-contentproperties only apply when there is a single line of items (in other words,flex-wrapis set tonowrap). With multiple lines, use thealign-contentproperty. It has the same values as thejustify-contentproperty, but with the additional value ofstretch, which is the default.
Once you've defined thedisplay,flex-flow, and how the content should display, you can move on to style the items inside the flex box.
Styling the Items in a Flex Box Container
You can put anything you want in your flex box container. But, just as with the container, whenever possible you should use HTML tags that are semantic. For example, if you're presenting a photo gallery, using thetag is more semantic than a
.
You aren't limited to single tags as the items in a flex box. If you're building an online store catalog, for example, each item might have an image and product description. As long as the image and product description are contained within another element, that grouping can be a flex box item.
The following code presents two examples of possible flex box items:
item 1
item 2
item 3
Item 1Item 2Item 3
In the first example, the items are theelements. In the second, theelements are the items. The figure items contain both an image and a caption, but theelement itself is the flex box item.
Once you have your items in place, you can give them several specific styles. By default the items in your flex box will display in the order they are written in the HTML, but you can adjust that arrangement with theorderproperty. Give the items an order as an integer (either positive or negative). Lower numbers will be displayed before higher numbers. Items with the same number will be displayed in the order listed in the HTML.
You can also define how an item should behave when there is more or less room in the container. You can allow the items to grow (withflex-grow) or shrink (withflex-shrink) to fit the container. These properties take a unit-less, non-negative number that serves as a proportion. For example, if you set all but one of the items toflex-grow:1;and that one item toflex-grow: 2;that lone item would attempt to use twice as much space as the others use. The default value forflex-growis0. Theflex-shrinkproperty works in the same way except that it defines how much the items should shrink. The default value forflex-shrinkis1.
You can also define the size of the elements before the remaining space is distributed, using theflex-basisproperty. The default value isautoand sets the size based on theflex-growandflex-shrinkproperties. But you can also define an explicit length. It's a little confusing, butthis W3C graphicshould help.
You can use this shorthand property for the previous three properties:
You can also adjust the alignment of the items individually with thealign-selfproperty, which has the valuesauto(the default),flex-start,flex-end,center,baseline, andstretch. These values work the same way as they do for the container element, but acting on just this one item.
Examples for How to Use Flex Boxes
Flexboxes can seem very confusing, so I've included a few examples for you to try on your own.
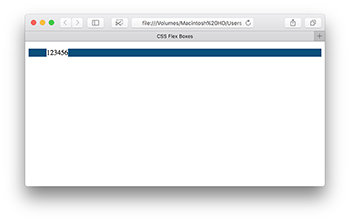
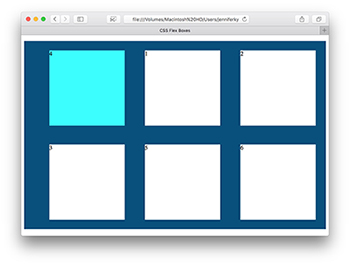
Basic Flex Box
You can create a basic flex box with just some simple HTML, such as an unordered list:
CSS Flex Boxes
1
2
3
4
5
6
You give the container (in this case the
tag) adisplay: flex;property. I also turned off the bullets on theelements:
The simple layout in this section usesResponsive Web Designto change the layout from one column in small devices to two columns for wider screens, and finally to three columns in large-screen devices. It positions the navigation using a nested flexible box within the flexible box container.Figure 5shows how it looks on a large-screen monitor. This layout was based on a layout found onMDNwith navigation menu fromCSS-Tricks. (By the way, these two resources are great for learning more about CSS3 flex boxes.)
Lorem ipsum dolor sit amet, consectetur adipisicing elit, sed do eiusmod tempor incididuntut labore et dolore magna aliqua. Ut enim ad minim veniam, quis nostrud exercitationullamco laboris nisi ut aliquip ex ea commodo consequat. Duis aute irure dolor inreprehenderit in voluptate velit esse cillum dolore eu fugiat nulla pariatur.Excepteur sint occaecat cupidatat non proident, sunt in culpa qui officiadeserunt mollit anim id est laborum.
Lorem ipsum dolor sit amet, consectetur adipisicing elit, sed do eiusmodtempor incididunt ut labore et dolore magna aliqua. Ut enim ad minim veniam,quis nostrud exercitation ullamco laboris nisi ut aliquip ex ea commodo consequat.Duis aute irure dolor in reprehenderit in voluptate velit esse cillum dolore eu fugiatnulla pariatur. Excepteur sint occaecat cupidatat non proident, sunt in culpaqui officia deserunt mollit anim id est laborum.
The CSS has two breakpoints that adjust how the boxes flex:
Using CSS3 flex boxes is a powerful tool for web designers to lay out both small sections and entire pages. Try out this technique to see how much more flexible your web pages can be!


 ut labore et dolore magna aliqua. Ut enim ad minim veniam, quis nostrud exercitation
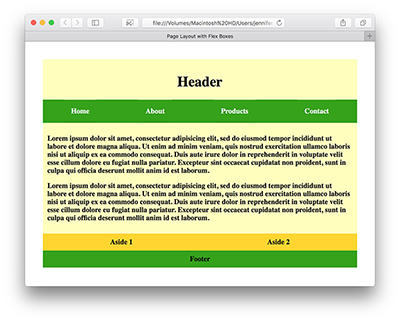

)
)
)
)
)
)
)